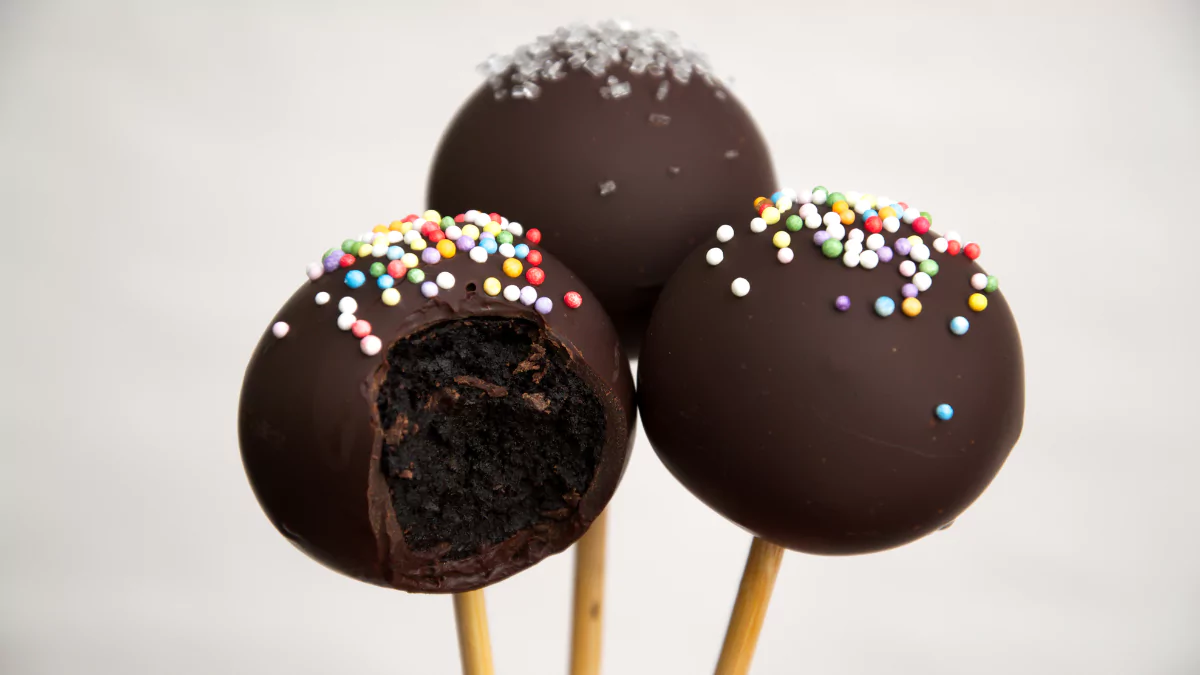
If you’ve ever savored the sweet delight of Starbucks cake pops, you know why they’re a favorite treat. These tiny, bite-sized cakes coated in chocolate are fun, delicious, and perfect for any occasion. The best part? You can recreate them right at home!
This guide will walk you through the process of making Starbucks-style cake pops step by step. Along the way, you’ll learn tips, tricks, and creative variations to make them your own.
Why Make Cake Pops at Home?
Homemade cake pops are:
- Cost-Effective: Skip the premium prices at Starbucks.
- Customizable: Choose your favorite flavors, colors, and decorations.
- Fun to Create: A great activity for kids or as a party project.
Whether for holidays, birthdays, or a simple indulgence, homemade cake pops are a hit.
What Are Starbucks Cake Pops?
These delightful treats combine crumbled cake and frosting, shaped into balls, and coated in a glossy candy shell. Their moist interior and crunchy exterior make them irresistible.
For more dessert inspiration, explore this festive Christmas tree cake recipe for your next celebration!
Ingredients for Perfect Cake Pops
Cake Base:
- 1 box of cake mix (any flavor)
- 3 eggs
- 1 cup of milk
- ½ cup of vegetable oil
- 2 teaspoons of vanilla extract
Frosting:
- 4 tablespoons of vanilla, chocolate, or cream cheese frosting
(For extra moisture, learn how sour cream enhances desserts).
Candy Coating:
- 16 oz white almond bark or candy melts
- 1 tablespoon of vegetable oil for shine
- Gel-based food coloring (optional)
- Sprinkles, edible glitter, or toppings of your choice
(Discover unique ways to use almond bark with this guide).
Tools You’ll Need
- Mixing bowls
- Hand or stand mixer
- Cake pop sticks
- Parchment paper
- Styrofoam block or box for drying
- Mini cookie scoop for even portions
Need dessert ideas with unique textures? Try this crumb cake recipe.
How to Make Starbucks Cake Pops
1. Bake the Cake
- Preheat your oven to 350°F (175°C).
- Prepare the cake mix as per the instructions or use your favorite homemade recipe.
- Once baked, let the cake cool completely.
2. Make the Cake Mixture
- Crumble the cooled cake into fine crumbs using your hands or a food processor.
- Gradually add frosting and mix until the texture is moist but rollable.
Tip: Avoid over-mixing. For more on achieving the perfect texture, check out how to keep cakes moist.
3. Shape the Cake Balls
- Use a cookie scoop to portion the cake mixture evenly.
- Roll the portions into smooth, 1-inch balls.
- Place the cake balls on a parchment-lined baking sheet and freeze for at least 1 hour.
4. Prepare the Candy Coating
- Melt almond bark or candy melts in a microwave-safe bowl, stirring every 30 seconds.
- Add a tablespoon of vegetable oil to ensure a glossy finish. (Learn the secrets of melting chocolate)
- If desired, mix in gel-based food coloring for vibrant pops.
5. Assemble the Cake Pops
- Dip the tip of each stick into the melted coating and insert it halfway into a chilled cake ball.
- Freeze the pops for 10 minutes to secure the sticks.
6. Dip and Decorate
- Fully dip each cake pop into the melted coating, ensuring even coverage.
- Gently tap off excess coating.
- Add sprinkles or decorations while the coating is still wet.
- Place the finished pops upright in a styrofoam block or box to set.
Pro Tip: Add flair with crumb cake-inspired toppings for unique textures.
Decorating and Flavor Ideas
Decorating Tips:
- Use themed colors for holidays or events.
- Add drizzle patterns with contrasting candy melts.
- Create designs with edible markers once the coating has dried.
Flavor Variations:
- Red Velvet Classic: Pair red velvet cake with cream cheese frosting.
- Lemon Bliss: Combine lemon cake with vanilla frosting for a refreshing twist.
- Funfetti Pop: Use funfetti cake mix for a colorful surprise inside.
Storage and Serving Tips
Short-Term Storage:
- Refrigerate cake pops in an airtight container for up to 5 days.
- Bring to room temperature before serving for optimal flavor.
Long-Term Storage:
- Freeze uncoated cake balls in a freezer-safe bag for up to 2 months.
- Thaw completely before dipping and decorating.
FAQs About Starbucks Cake Pops
1. How do I prevent cake pops from falling off the sticks?
Dip the stick in melted chocolate before inserting it into the cake ball. This creates a secure hold.
2. Can I make vegan cake pops?
Yes! Use vegan cake mix, plant-based frosting, and dairy-free candy melts for a plant-based version.
3. How do I get a shiny coating?
Add a tablespoon of vegetable oil to the melted candy coating for a smooth, professional finish.
4. How long can I store cake pops?
Properly stored, cake pops last up to a week in the refrigerator. However, they’re best enjoyed within 3–4 days.
5. Can I customize cake pops for dietary needs?
Absolutely! Substitute gluten-free cake mix or low-sugar frosting to accommodate dietary restrictions.
Final Thoughts
Making Starbucks-style cake pops at home is a fun and rewarding experience. From choosing your favorite flavors to decorating with creative touches, these treats are perfect for any celebration or as a sweet indulgence. Follow this guide, and your homemade cake pops will not only rival Starbucks but also become a favorite dessert for friends and family!

