
Craving a rich, creamy dessert that never goes out of style? This New York-Style Cheesecake Recipe delivers everything you love about the iconic classic—velvety texture, a subtle tang from cream cheese, and a buttery graham cracker crust that holds it all together. Whether you’re a first-time baker or a seasoned pro, this guide walks you through each step to help you nail that perfect cheesecake at home.
Unlike no-bake alternatives, the traditional New York-Style Cheesecake Recipe is all about baking low and slow for that signature dense-yet-silky finish. We’ve also included pro tips on how to avoid cracking, when to use a water bath, and the difference between using sour cream vs. heavy cream in your filling. If you’re looking for more classic desserts, check out our homemade chocolate cake and buttery apple pie recipes right here on the blog.
Still curious about the origins and technique behind this famous dessert? You can explore more about what makes New York-style cheesecake special or browse baking tools and essentials via our favorite picks on Williams Sonoma. Let’s dive into the full recipe below and bring a little bit of New York into your kitchen.
What Makes New York-Style Cheesecake Special?
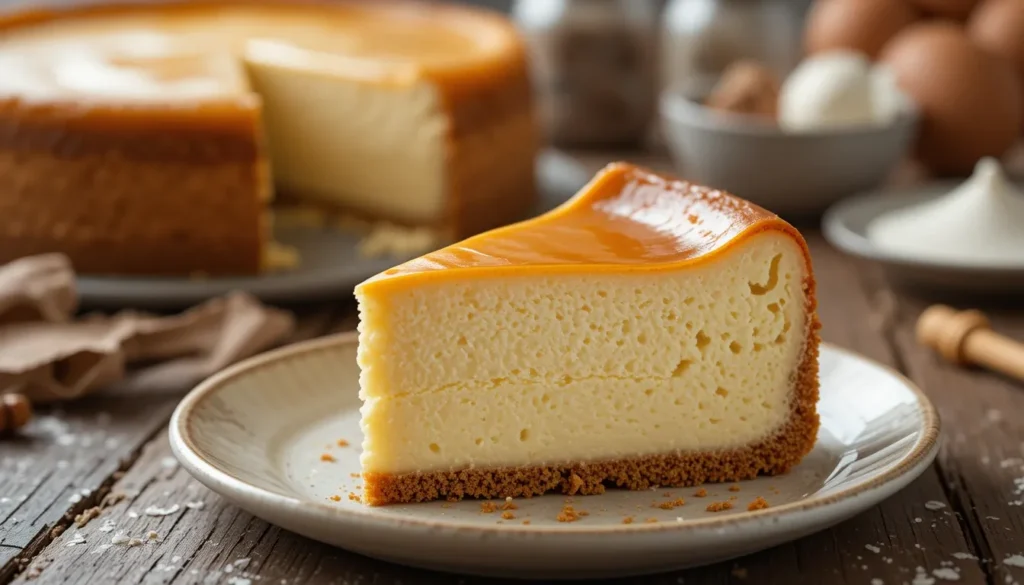
The recipe’s richness comes from a high quantity of full-fat cream cheese—often four full blocks. Unlike European or Japanese styles, New York-style is heavy, baked, and almost indulgently creamy. The texture is custardy but structured, perfect for slicing.
According to the Smithsonian’s history of cheesecake, this iconic dessert found its footing in the early 1900s thanks to Jewish delis across New York and the invention of Philadelphia cream cheese.
But it’s not just about baking—it’s about safety too. When handling cream cheese and eggs, follow FDA food storage guidelines to ensure your dessert is as safe as it is delicious.
Ingredients for Authentic New York-Style Cheesecake
To get that signature flavor and texture, you’ll need:
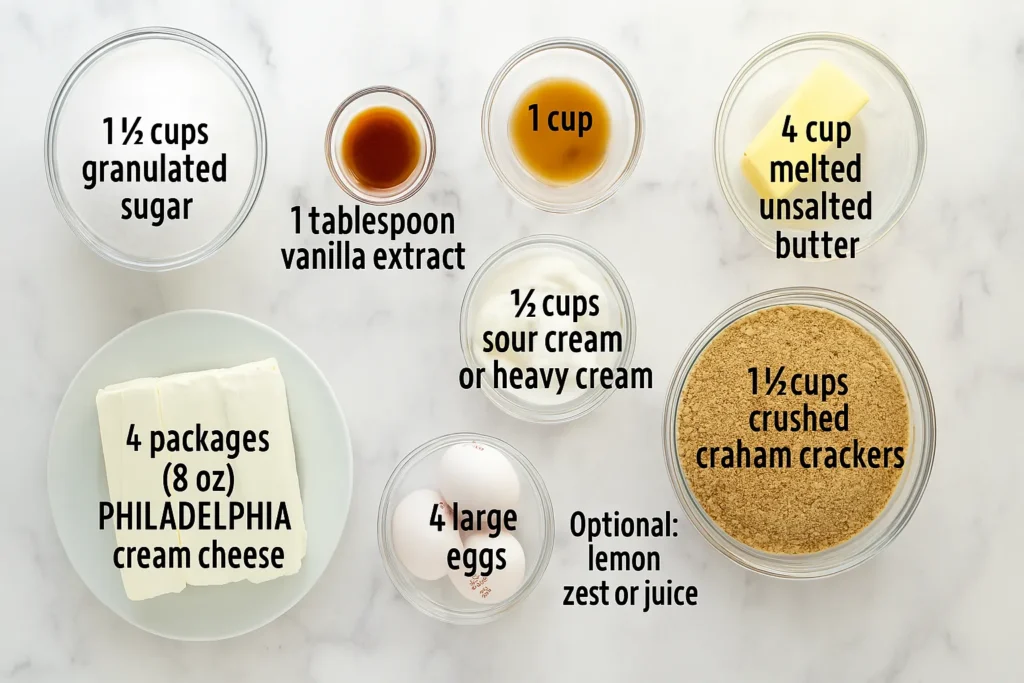
- 4 packages (8 oz) Philadelphia cream cheese
- 1½ cups granulated sugar
- 4 large eggs (room temperature)
- 1 cup sour cream or heavy cream
- 1 tablespoon vanilla extract
- Optional: lemon zest or juice
- 1½ cups crushed graham crackers
- ¼ cup melted unsalted butter
Ingredient Tips:
- Room temperature dairy ensures a smooth batter.
- Don’t skimp on the full-fat versions—it’s what makes this cheesecake “New York.”
- Experiment with a twist like this orange cheesecake recipe if you’re feeling creative.
Essential Equipment
- 9-inch springform pan
- Heavy-duty foil (for wrapping pan)
- Roasting tray (for water bath)
- Mixer (stand or hand)
- Rubber spatula
- Cooling rack
For home bakers who want quality gear, refer to Epicurious’ baking tool recommendations.
Step-by-Step: Classic New York-Style Cheesecake
1. Prepare the Crust
- Mix graham cracker crumbs, sugar, and melted butter.
- Press into the base of the pan.
- Bake at 350°F for 10 minutes and cool.
2. Make the Filling
- Beat cream cheese until fluffy.
- Add sugar and beat again.
- Mix in eggs one at a time.
- Stir in sour cream and vanilla.
3. Bake It
- Wrap your springform pan in foil.
- Place it in a roasting pan with 1″ of hot water.
- Bake at 325°F for 70 minutes.
- Let sit in the turned-off oven for another hour.
4. Chill It
- Cool completely at room temperature.
- Refrigerate for at least 6 hours or overnight.
Pro Tips for Success
- Avoid Overmixing: This introduces air and causes cracks.
- Water Bath Is Key: Prevents the edges from baking too fast.
- Don’t Overbake: Center should jiggle slightly when done.
For flavor and technique variations, explore this unique churro cheesecake fusion recipe!
Variations and Substitutions
While the classic recipe is hard to beat, there’s room to play:
- Use orange zest for a fruity zing
- Swap crust for chocolate cookies
- Try pumpkin puree and spices in fall
- Add a swirl of cherry compote before baking
Curious about using different dairy options? Learn about cream cheese substitutes to personalize your dessert.
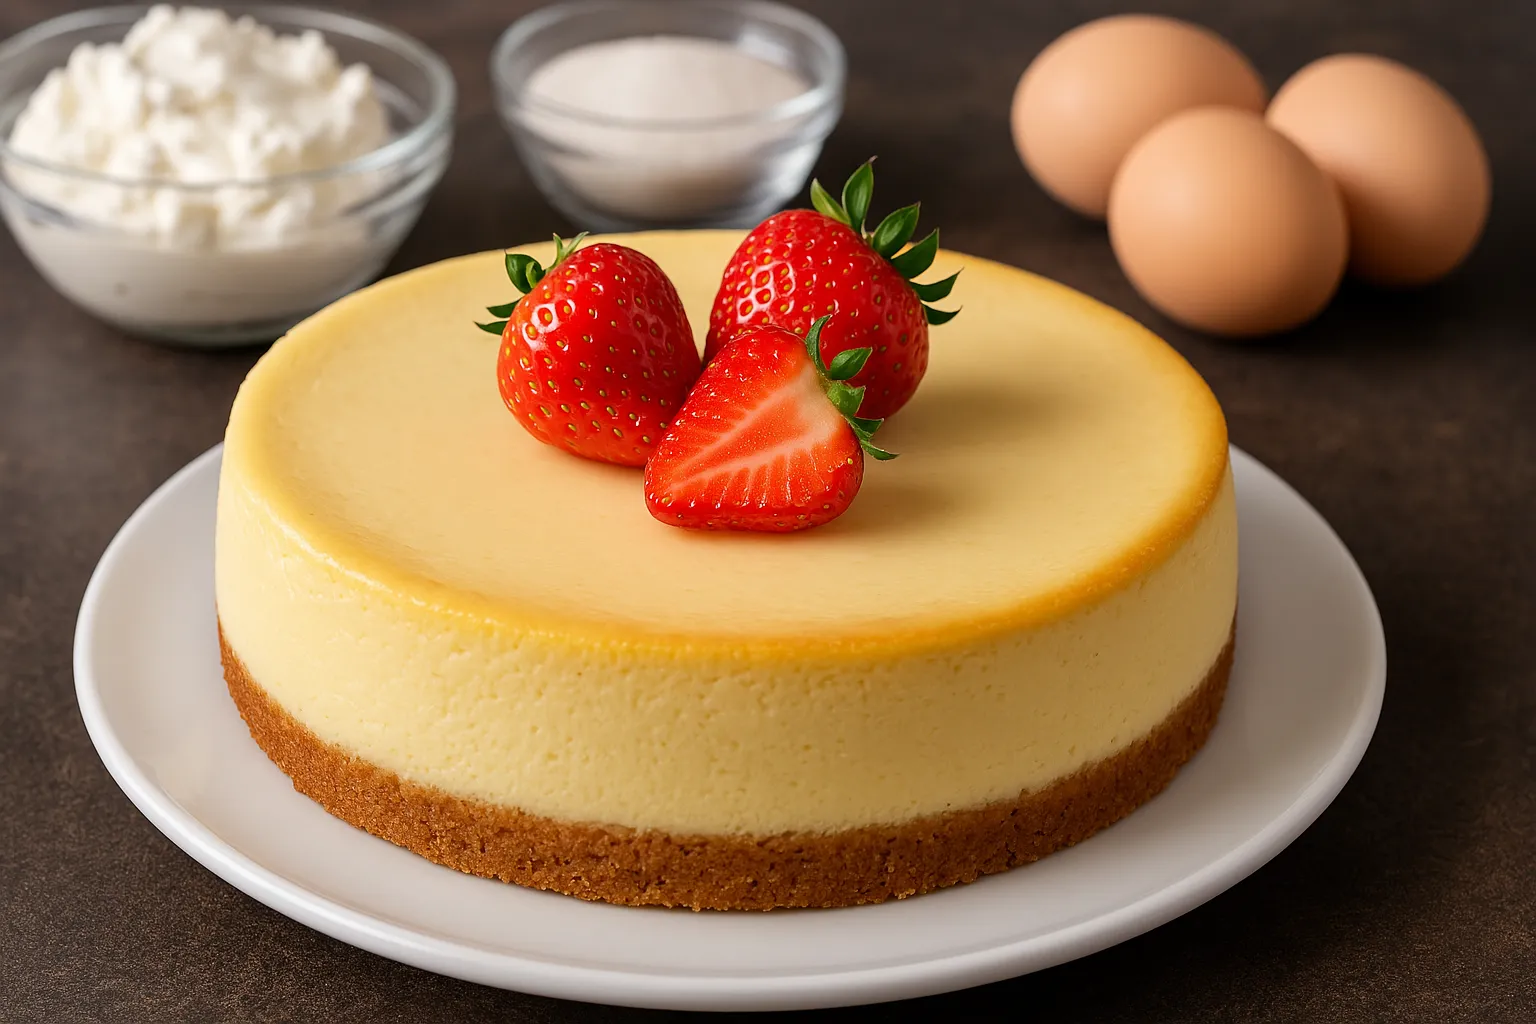
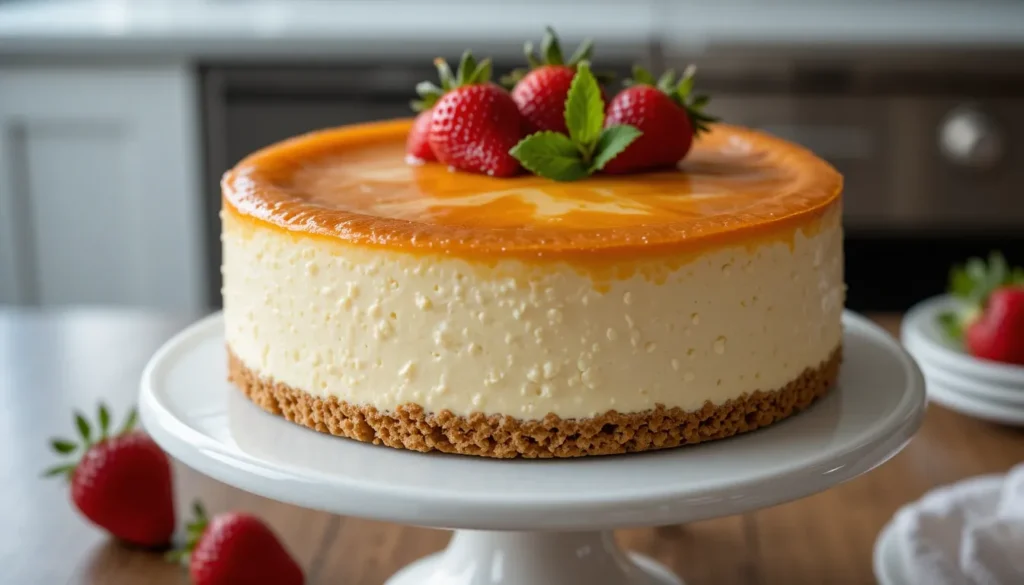
Cheesecake Toppings That Wow
You can serve New York-style cheesecake plain, but toppings add visual appeal and flavor:
- Strawberries, raspberries, blueberries
- Lemon glaze or orange marmalade
- Whipped cream or sour cream topping like this classic version
- Chocolate ganache
Storage Tips
Cheesecake is best made ahead and stored right:
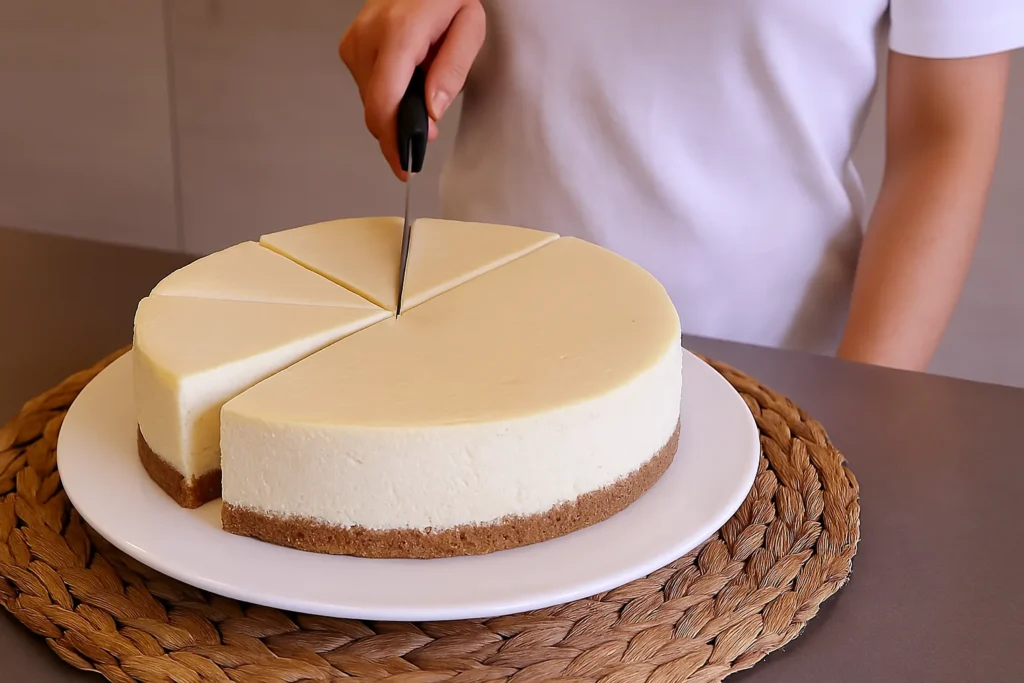
- Chill for 6+ hours before slicing.
- Store in the fridge for up to 5 days.
- Freeze slices for up to 2 months (wrap tightly in plastic + foil).
Nutritional Snapshot (1 slice, 12 total)
- Calories: 425
- Fat: 32g
- Carbs: 28g
- Protein: 7g
- Sugar: 20g
Watch your cream ratio—here’s what happens when there’s too much sour cream in cheesecake.
FAQ: All About New York Cheesecake
What makes New York-style different?
The extra cream cheese and sour cream give it a denser texture and tangy flavor.
Can I bake without a water bath?
Yes, but expect cracks. A bath creates a gentle, even bake.
What if I don’t have graham crackers?
Substitute with Oreos, Biscoff cookies, or even pretzels.
Can I use Greek yogurt instead of sour cream?
Yes—but expect a tangier, slightly thicker texture.
Final Thoughts
A well-made New York-Style Cheesecake is more than just dessert—it’s an art form. From its velvety texture to its golden crust, every element brings joy. Whether you follow the classic route or experiment with ideas like an orange cheesecake twist or a sour cream topping, the end result is always worth it.
Take your time, follow each step, and enjoy your masterpiece. Happy baking!